
Installing or replacing your current router
If you have a WiFi 5 or WiFi 6 router (square-shaped on top) you can follow the options directly below. If you have a WiFi 7 router (droplet-shaped on top), watch the help video further down the page.
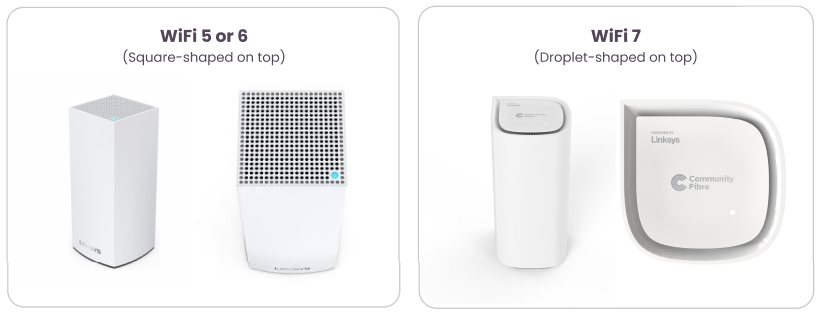
Follow these simple steps when connecting a WiFi 5 or WiFi 6 router (square-shaped on top):
- Connect the router to a power source.
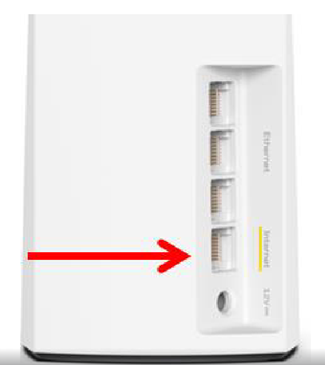
- Connect the ethernet cable that came with the router to the port that has a white/yellow line.
- Connect the ethernet cable to your modem (normally a small black or white box displaying green lights).
- Wait for up to 3 minutes.
- The router light should change to a solid blue / turquoise.
- You should now have an internet connection.
If the light is displaying a solid purple light, press the red reset button (located on the bottom of the router) 5 times, quickly. Once the light turns solid blue, the connection is complete. Alternatively, if your router has a ‘Pair’ button it can be pressed once.
Don’t forget: Your WiFi name and password can be found on the bottom of your new router.
Follow this video when connecting a WiFi 7 router (droplet-shaped on top):
If you need any further help with setting up a new router, please submit a request.

