Linksys Velop Mesh network: Adding an additional router to an existing Linksys network
Adding an additional router (child node) to your existing network is quick and easy.
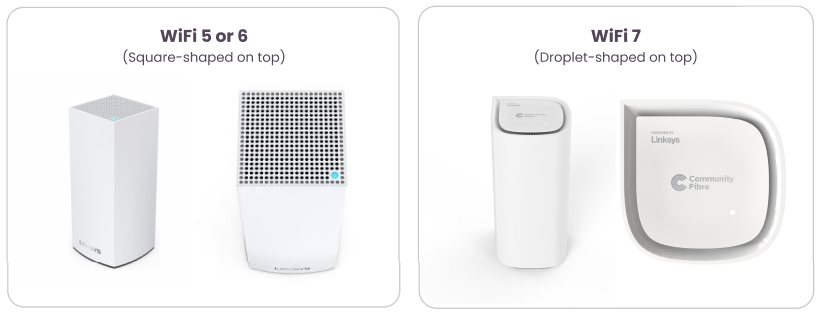
If you have a WiFi 5 or WiFi 6 router (square-shaped on top) you can follow the options directly below. If you have a WiFi 7 router (droplet-shaped on top), follow the advice further down the page.
Please note: If you have WIFi 6 and WiFi 7 routers it should be the WiFi 7 router (droplet-shaped on top) that should be connected as the primary router and connected to your ONT (the black or white box bringing fibre into your home).

WiFi 5 or WiFi 6 routers (square-shaped on top)
This video guide below walks you through this process and explains how to get the most from your equipment.
WiFi 7 routers (droplet-shaped on top)
You can additional router (child node) in two ways. Either use the Pair button on the router or use the Linksys Now dashboard.
1. Using the Pair button
Watch this short video guide to Instant-Pair a router with the Pair button:
2. Using the Linksy Now dashboard
-
Connect your computer or mobile device to the Linksys WiFi network.
-
Power ON the child node near the parent router during setup. After the child has been added, you can move it. Wait for the light to turn solid blue on the new child node. Seeing a Red light? Hold down the reset button for about 15 seconds to restore the router to factory defaults.
-
Open the Linksys Now dashboard.
-
Enter the router password when prompted. The default router password is the same as the default WiFi password of the parent router connected to your modem. Click Log in. If you have forgotten the password, click on Forgot password to change it.
-
Click on Menu, then click on Setup a New Product in the My Network tile.
You can also go to Instant-Topology > Instant-Actions on the parent router, and then click on Instant Pair. The node will begin to flash a white light and scan for unconfigured nodes.
-
Make sure your new child node has a solid blue light. Click Next.
-
The router will begin to scan for unconfigured nodes. Please wait. This can take a few minutes.
-
Once the child has a solid white light, this means it has successfully been added to your network. Your new node will be displayed in the list. Click Next.
-
You can now relocate the child node.
Not seeing the new child node?
Click Refresh.
If the light on the new node is still blinking white, just click Next; sometimes it may take a bit longer to appear in the list. Once the light turns solid white, it is now ready. You can view all your connected nodes on the Home page.
If the light on the new child node is still solid blue, this means the router did not detect it. Bring the child node closer and click on Try again or try using the Pair button method.

